Accelerometer Calibration in Mission Planner
This article shows how to perform basic accelerometer calibration (using Mission Planner).
Note
Accelerometer calibration is mandatory if you’re using EKF to estimate vehicle position.
Calibration steps
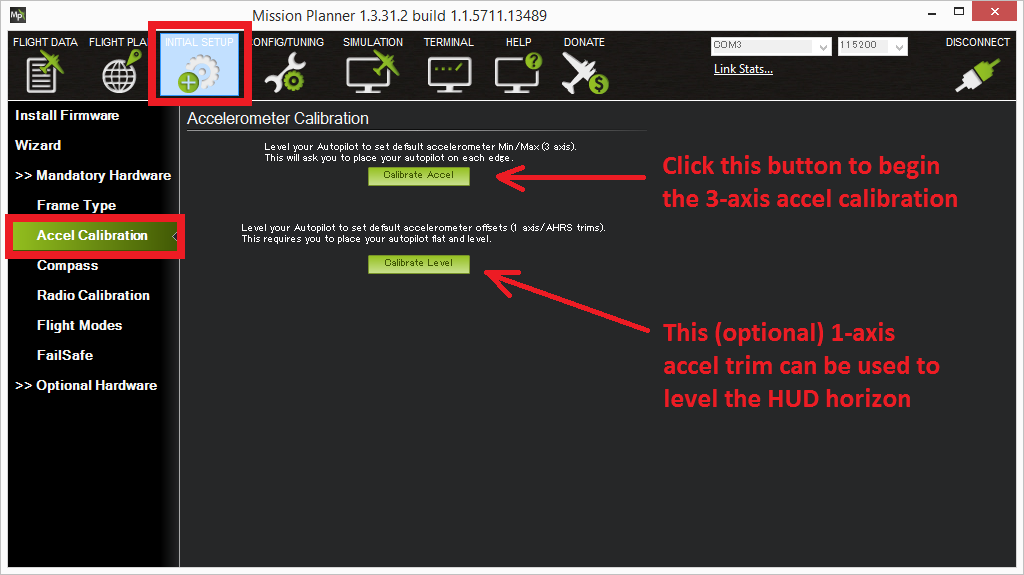
Under Initial Setup | Mandatory Hardware, select Accel Calibration from the left-side menu.
Click Calibrate Accel to start the calibration.
Mission Planner will prompt you to place the vehicle each calibration position. Press any key to indicate that the autopilot is in position and then proceed to the next orientation.
The calibration positions are: level, on right side, left side, nose down, nose up and on its back.
[/site]
Tip
- It is important that the vehicle is kept still immediately after pressing the key for each step.
- You may need to calibrate the board before it is mounted if the size/shape of the vehicle makes this difficult.
- The level position is the most important to get right as this will be the attitude that your controller considers level while flying.
Proceed through the required positions (it is not necessary to use the Click When Done button).
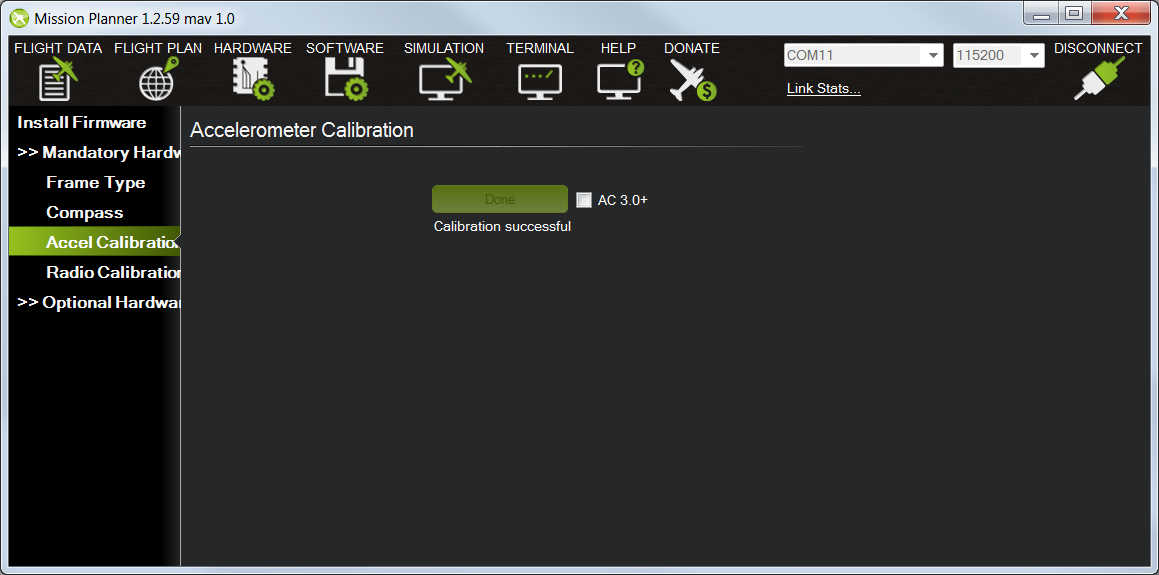
When you’ve completed the calibration process, Mission Planner will display “Calibration Successful!” as shown below.
Video demonstration (Copter)
Video demonstration of accelerometer calibration. This is for an older version of Copter/Mission Planner, but is useful as an example of how you might hold a Copter.
[/site]


